How to run LLMs locally using Ollama and Docker Compose
Hello and welcome! 🌟 In the dynamic world of technology, AI and Large Language Models (LLMs) have been making some truly remarkable strides. Whether you're a tech enthusiast or just casually keeping up with the latest trends, it's hard to miss the buzz around these advancements. But here's the exciting part: what if you could run one of these powerful models right from your own computer?
You're in luck because that's exactly what I'm here to talk about! 😊 In this blog post, I'm thrilled to share my journey in deploying a framework that allows you to run LLMs locally, complete with a user-friendly web interface.
Step 1 - Installing Docker Desktop
The first step will be to install the Docker Desktop Application by downloading it from the official Docker website:
https://www.docker.com/products/docker-desktop/
This will install everything you will need in terms of software.
Step 2 - Creating a docker-compose file
A docker-compose file is a YAML file where we define and configure the services (like Ollama) that Docker will run. Think of it as a recipe that tells Docker how to set up and link your applications. In a traditional computing environment, you would run an application and then configure the other application to connect to the first one. This is similar to what docker-compose files do, just programmatically.
In order to start the applications we need, the following code needs to be pasted in a file called “docker-compose.yaml” which you can save anywhere you want.
Please note that you have to change the metrics in the <Brackets> to fit your system. Use the e.g.s as a reference to how the syntax should be.
version: "3.8"

services:
  ollama:
    image: ollama/ollama:latest
    restart: unless-stopped
    ports:
      - "11434:11434"
    volumes:
      - ollama:/root/.ollama
    deploy:
      resources:
        limits:
          cpus: <Amount of CPU Cores to assign to the AI, e.g. '10.0'>
          memory: <Amount of RAM to assign to the AI, e.g. 24G>
        reservations:
          cpus: <Minimum Amount of CPU Cores to reserve for the AI, e.g. '0.5'>
          memory: <Minimum Amount of RAM to reserve for the AI, e.g. 500M>
        <IF YOU DO NOT HAVE AN NVIDIA GPU, REMOVE THE FOLLOWING>
        devices:
            - driver: nvidia
              count: all
              capabilities: [gpu]

  ollama-webui:
    image: ghcr.io/ollama-webui/ollama-webui:main
    restart: unless-stopped
    ports:
      - "3000:8080"
    depends_on:
      - ollama
    volumes:
      - webui-data:/app
    deploy:
      resources:
        limits:
          cpus: <Amount of CPU Cores to assign to the UI, e.g. '2.0'>
          memory: <Amount of RAM to assign to the UI, e.g. 4G>
        reservations:
          cpus: <Minimum Amount of CPU Cores to reserve for the UI, e.g. '0.25'>
          memory: <Minimum Amount of RAM to reserve for the UI, e.g. 500M>

volumes:
  ollama:
  webui-data:
Now save the file and the most complicated thing has been completed. Congrats :)
Step 3 - Starting the Docker Containers
Now that you have created the necessary file for the deployment of the docker containers, you will need to start them. This you will do as follows:
Open the Docker Desktop Application to make sure it is running.
Open a Command Line Interface (Look for Command Prompt on Windows, or Terminal on Mac and Linux)
Navigate to the folder where you saved your docker-compose.yaml file by using the following command in your terminal:
cd /path/to/your/folderMake sure the docker-compose.yaml file is in the folder by running the following command and checking the output. If the file is listed in the output, you are in the correct directory/folder:
lsAfter making sure the file exists, run the following command to start the docker-containers:
docker-compose up -dCheck the output - if ollama and ollama-webui both show as “started”, you’re good to go!
Step 4 - Setup the User Interface
Now that the containers have started, navigate to the Web-UI in your browser by going to http://localhost:3000 from the same machine docker is running on or use the IP Adress of the device followed by the :3000 port (e.g. http://192.168.178.85:3000).
You will be prompted to create a user account, go ahead and do so. The data will never leave your system as you are running everything locally.
Step 5 - Download an LLM Model and start typing :)
After creating your account, you will be greeted with a chat interface, similar to ChatGPT or Le Chat.
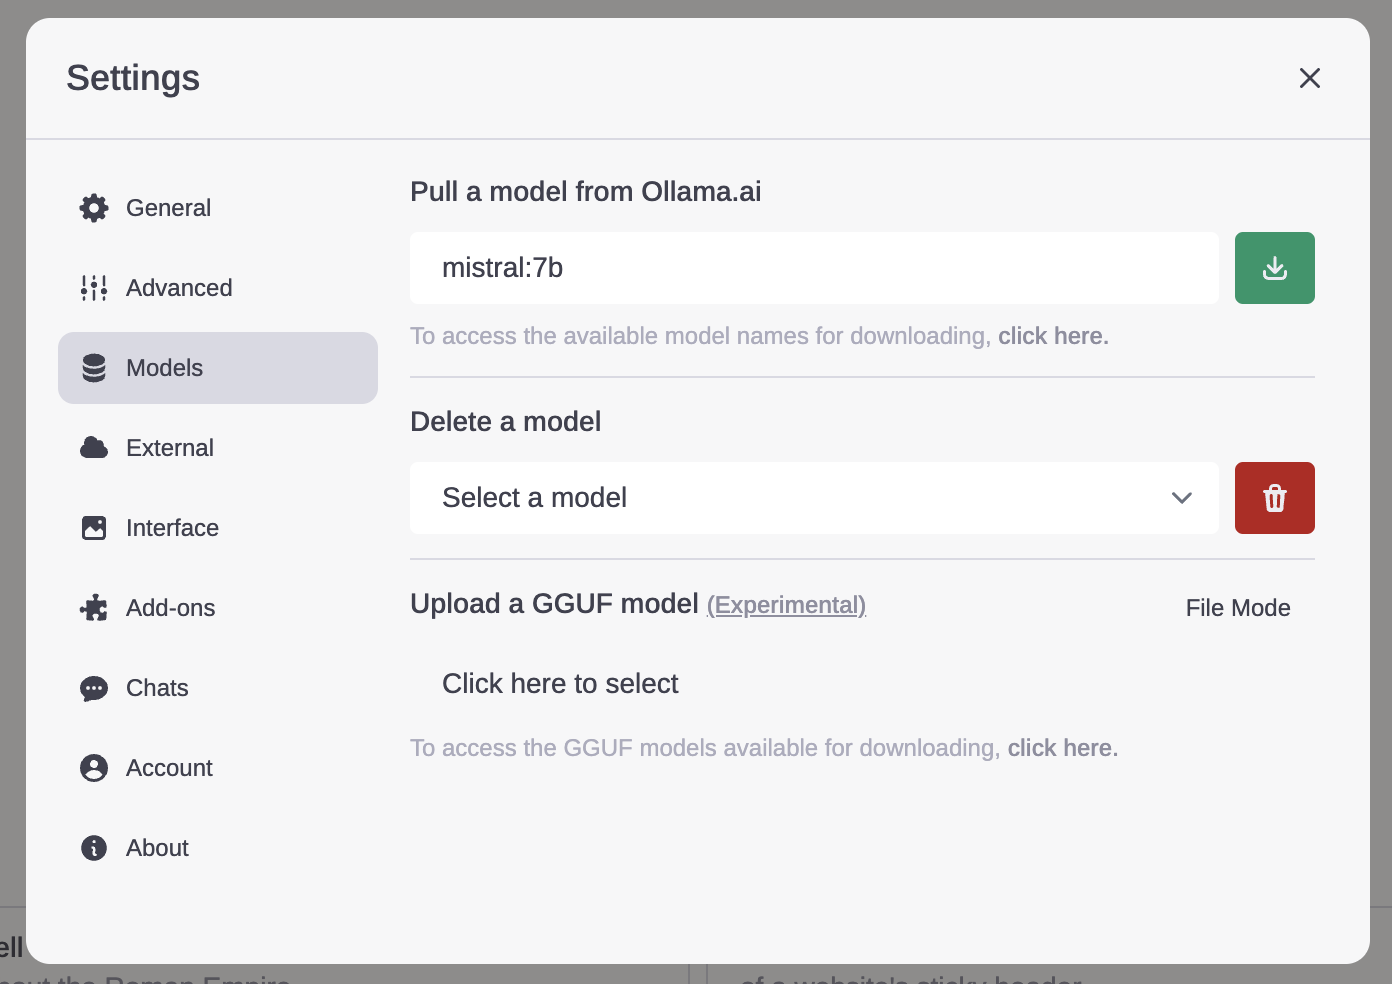
Before you can go ahead and ask questions tho, you will need to download a model. Do this by selecting the settings icon, navigating to the “models” tab and then input the model name you’d like to download, e.g. “mistral:7b”.
The model, if found in the ollama database, will then be downloaded and after it’s finished, select the model in the dropdown.
Now you can start trying it out. Have fun! :D
Conclusion
And there you have it! You've successfully set up your own local LLM using Ollama. This is just the beginning – explore, experiment, and see what amazing things you can create with this powerful technology at your fingertips!
I'd love to hear about your experiences with setting up and using Ollama. Share your stories, challenges, or any cool applications you've developed in the comments below!


